async='async' data-ad-client='ca-pub-1704385665578974' src='https://pagead2.googlesyndication.com/pagead/js/adsbygoogle.js'/> Welch House 1900: Search results for easter
Showing posts sorted by relevance for query easter. Sort by date Show all posts

Chocolate Easter Bunny Tablescape

 I am so excited to be a part of the Easter Celebratios blog hop hosted by my talented friend Amber at Follow the Yellow Brick Home.

I know you found a ton of beautiful  Easter inspiration for your living room decor from Blue Sky At Home and hopefully you'll find some dining room inspiration here!


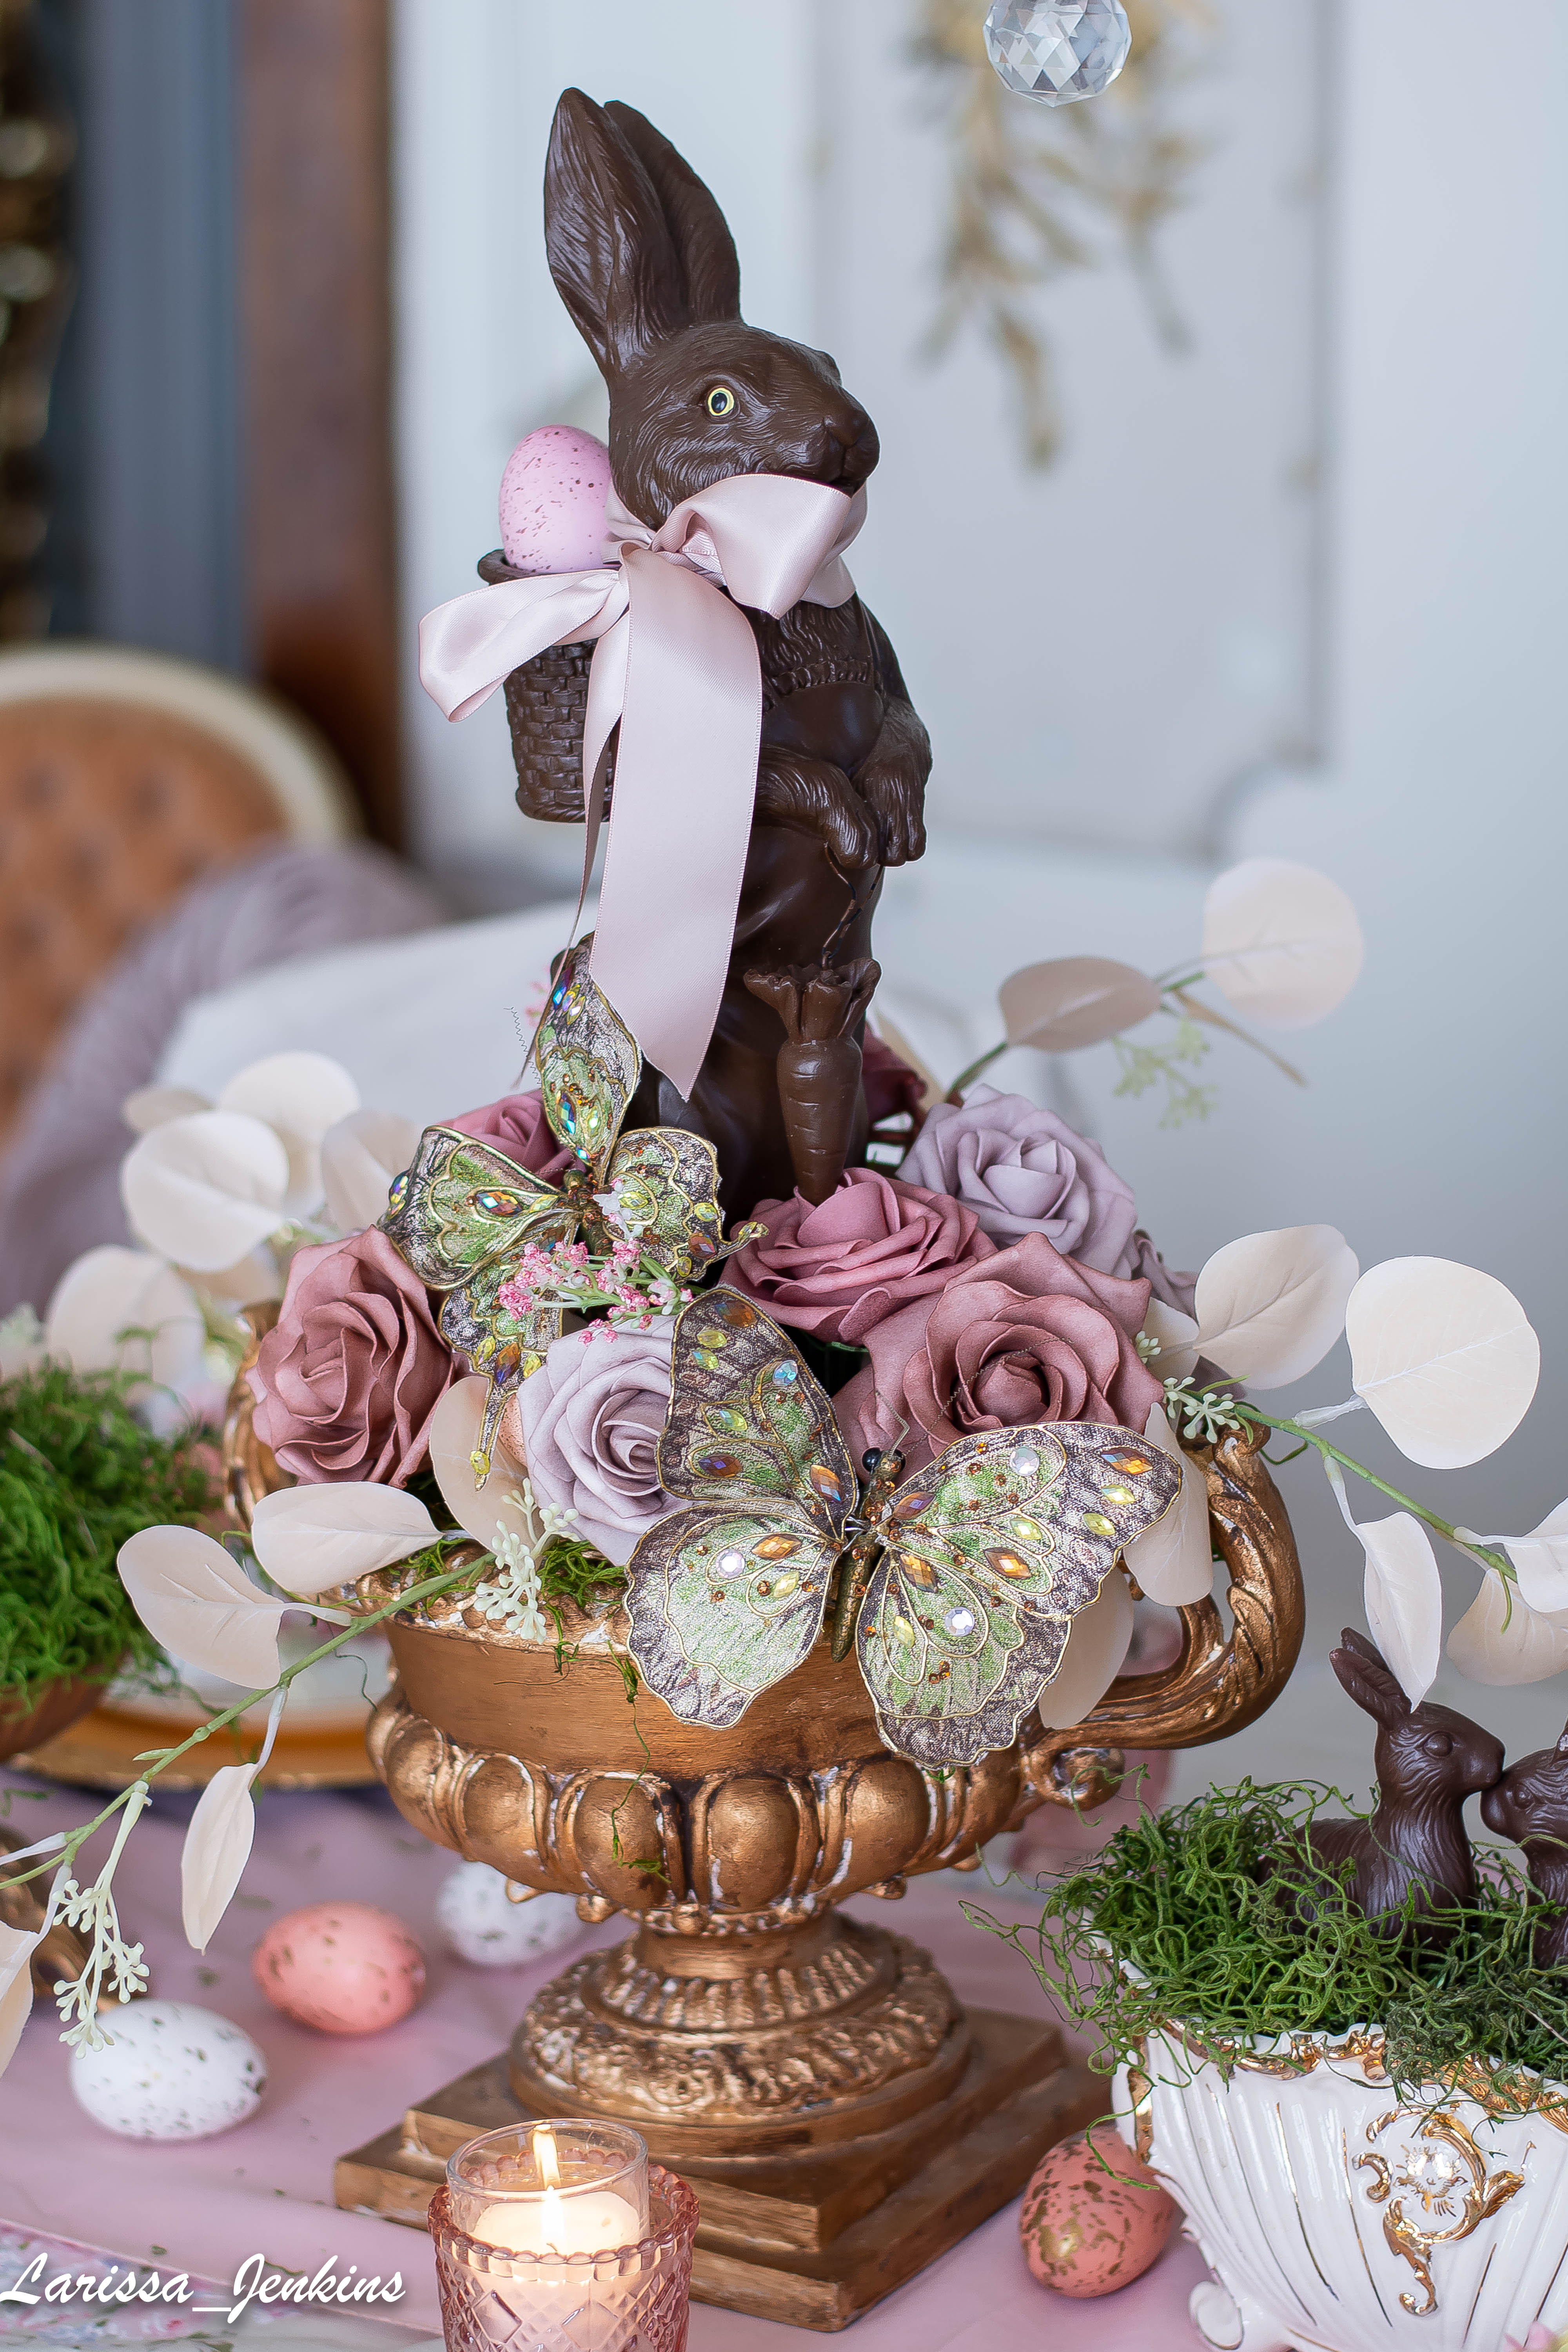
 For some reason I find decorating for spring so much more difficult than the other seasons. I don't have have a lot of Easter decor because of this reason, but I do collect faux chocolate bunnies. My largest bunny is the one below. He is made by Martha Stewart and I bought him on QVC.


I like to group my chocolate rabbits together to make more of an impact. This year I decided to create a large vignette of bunnies for my dining room table.


I like to display the bunnies in old urns and silver server sets. 


At each place setting I have a foiled Easter chick, they are also from QVC and look very much like a foiled chocolate treat!


I also brought out my floral egg cups for each setting. Instead of using eggs for the egg cups, I decided on a few carnation blooms.


The mantle got decorated with an eucalyptus and egg garland. The chocolate bunnies on either side of the basket are the very first that I ever purchased many years ago.


The antique chairs at the ends of my table were given to me by my sister. Once the fabric was blue, but since has faded to green. I would like to get them recovered someday, but for now they look nice with my Simply Shabby chic tablecloth.


I found the tablecloth on Ebay a few weeks ago still brand new in an unopened package! I love how feminine and spring like it is!


The bunny below is so precious because its holding a baby bunny, I've never seen one like it before!


Over all I am happy with my display of bunnies!


I always keep an eye out for faux chocolate bunnies throughout the year, as one can never have enough!


The linen cabinet in the dining room also received a few faux foil bunnies as well. These are so darling! I love the pink foil and the gauzy blue ribbons.


My french chair was the perfect spot for a trio of robin's eggs.


I hope you enjoyed my Easter tour of the dining room! I wish you all a beautiful Easter!


Thank you so much for vistiting!


  • -Larissa


You are invited to the Inlinkz link party!

Click here to enter

Buttered Easter Lamb


Today I wanted to share how to make a buttered lamb for your Easter table. Now I have only been making these for seven or eight years and once a year at that. Many people are taught at a young age to make beautiful buttered lambs and it is a cherished tradition passed down through the generations for the Easter holiday. Fun fact: I showed my five year old a picture of my buttery masterpiece and asked him what he thought it was....after thinking very hard, his first guess was a unicorn with crazy hair. Geez...lol.  I guess beauty is in the eye of the beholder...lets get started so you can create your own unicorn, I mean lamb. lol


Supplies needed:

-2 sticks of cold butter

- 1 Tablespoon of butter, softened

- 1/8 tsp. ground cinnamon

- 2 whole cloves

- garlic press


-toothpicks


First thing you need to do is cut a third from the end of one stick of butter. Place the larger piece of butter on the serving dish to use as the lamb 's body. Spread some of the softened butter on the cut edge of the smaller piece and position on top of the larger piece of butter to create lamb's head. Your lamb should look like the photo below.


Cut a diagonal slice from two corners of the second stick of butter as shown in photo below. These pieces will become the ears of your lamb. Spread some softened butter on one end of each piece and attach to lamb's head. At this point my butter ears began to get soft so I was able to mold them a bit to make them more realistic looking. If the butter gets too soft to work with just refrigerate for a bit to firm it up.


Next you will need to cut a 1/4 inch slice from the other end of the stick of butter. Then you will cut that slice in half diagonally. You will now have a triangle. Spread some softened butter on the flat end of the triangle and attach it to the lamb's head to create a nose.


Your lamb now should be looking similar to the photo below. What I would do next is go ahead and insert the cloves right above the nose for the lamb's eyes. I did this step last on my lamb and ended up disturbing some of the curls, so I think it would be easier to do it at this point.


Cut remaining butter and reserved triangle to fit into a garlic press.


 Squeeze butter through press in batches. Use toothpicks to curl pieces. Beginning at the top and working down, place curls on body. 


Your lamb should be starting to look more "lamb-like"! This project can be very tedious so be kind and patient with yourself. Remember perfection is not the goal...its the memories!


Once you have completed  your darling Easter lamb, you will need to dip your toothpick into the ground cinnamon to create some nostrils.


He is finished!! This buttered lamb is a wonderful addition to an Easter table. When I bring mine to Easter dinner I always get a lot of compliments on him even though he is not perfect!


This year I'm hoping to make another one with my little boy. I think kids would really enjoy this project and I bet their little lamb creations would look so sweet!!


I had to include a photo of some pretty blooms!


I hope I have inspired you to create a new Easter tradition of your own by making a buttered lamb. They really are the sweetest looking lambs.


Thank you for stopping by!!

-Larissa


Parade of Bunnies


Easter is such a fun holiday to decorate for and I was so excited to be included in this wonderful "Hop into Easter" blog hop hosted by my dear friend Amber at Follow The Yellow Brick Home. Thank you so much Amber for hosting!
If you are coming over from Emily's beautiful home at Le Cultivateur  I would like to welcome you to Welch House! 

I do love Easter and springtime, but I have to be honest when I say that I have such a hard time decorating for this time of year! I don't have a lot of Easter decor or spring decor, and the items I do have seem to clash with one another. This year I decided to only bring out my very favorite items for the holiday and those items were my small collection of Faux chocolate bunnies.


I have been collecting these cuties for a long time now, and as much as I love them, I have the hardest time blending them into my Easter decor. 


After some thought, a light bulb went off in my head...why don't I group them together and create a sweet bunny vignette  instead of spreading them all over the house!?


I really didn't want to spend any money on this idea so I started "shopping" my house. As I started digging through cabinets and armoires I realized that I had quite the collection of urns and other "urn-like" items...but how would I be able to make them all flow together? Another light bulb goes off in my head...gold paint. I absolutely love gold gilded mirrors and dressers, why not gild my urns? So I did just that and added a bit of dark wax to age them. Perfect!


I decided to showcase each of my bunnies in their very own urn pedestals. I filled each one with some Spanish moss and a few colored eggs. I absolutely love the way it turned out! Everything you see on top of my piano aside from the bunnies, I have thrifted for just a few dollars each. In fact the mirror I found at a garage sale for $12 and the chandelier for only $5 at another garage sale last summer.


These two sweet little bunnies I grouped together and they look like they are giving each other a kiss.


The tall bunnies on the ends are my very favorites. I bought them at JoAnne Fabrics years ago and I love their vintage vibe.


With all of the bunnies lined up on the piano it just reminded me of an Easter Parade line up. I am going to do this set up every year I think. It will be fun to search for more chocolate rabbits and pretty containers to display them in, throughout the year.


On the dining room mantel I decided to display another chocolate rabbit in a very rustic basket. 


I added soft pink satin ribbons to the sides.


Speaking of bunnies....


There seems to be one more that popped up recently here at Welch House.


Meet the newest addition to our family...a sweet girl that we named Antoinette.
We've had her since late February and she is much bigger now! These are just some of the very first photos that I snapped a couple of weeks after she arrived at her forever home.


We love her! 


Also here is a sneak peek at my next blog post...I cant wait to share it with you.


Thank you so much for visiting! I hope you enjoyed seeing my "Parade of Bunnies!"
Next up is Decorate and More with Tip where I'm sure you will find more beautiful Easter inspiration!!

-Larissa


You are invited to the Inlinkz link party!
Click here to enter

French Country Easter Table

Today I would love to share with you my Easter table. I have to admit setting a beautiful table is not one of my strongest talents but I am trying to put more effort into my styling. This Easter table is one of my very favorites so far. I've really been on a mission this year to try my hardest to not spend any money on new holiday decor and use what I already have, mostly because I'm trying to save my money to put towards refreshing the house and other home improvement projects.

For this particular table I started by using brass chargers and layers of beautiful mixed patterns of china. The sweet little egg cups are TJMaxx finds from last year and I absolutely love them! 
I think they compliment the china plates so nicely!


I used my favorite antique crystal stemware with the floral swag etchings that I recently found thrifting.  Next to them I used some smaller stemware to hold my favorite Cadbury chocolate eggs.


But the star of the show I think is the floral arrangement. I spotted this three tiered vase at the thrift store recently, it was partially hidden behind a bunch of junk. I really wasn't impressed with it at first but as I looked at it more closely it started to remind me of the Seventeenth century Tulipiere Vase.


While an authentic or even a reproduction Tulipiere vase is currently out of my budget...this little guy was not. So for only $7.99 I was getting a Tulipiere look alike vase to bring a bit of seventeenth century European charm to my Easter table... yes please!


I picked up a few discounted grocery store rose bouquets and began to fill up the tiers. Whenever I encountered some empty spaces I just filled them in with a few sprigs of faux lavender that I found at Wal-Mart for under a dollar. I think it turned out so pretty!


The little brown bunny I was thrilled to find while thrifting last summer. It is extremely old and is actually a money bank! I also love it because it looks so similar to my real life bunny Antoinette who you met in my last post.


I always get so many compliments and questions on my lace tablecloth that you see here. Its actually not even a tablecloth! Can you believe that they are Martha Stewart curtain panels from close to twenty years ago?!! When I was a teenager they hung in our family room.


 I love the elegance and romance that they bring to the table.


 After twenty years and many washes they are still in perfect condition!


I'm also loving the embroidered antique panel that I hung in the doorway that leads to the kitchen.


I'm really pleased with this sweet Easter tablescape. Aside from the napkins and pink table runner,  most everything on my table was thrifted.


Do you love to go thrifting? Will you be using any of your thrifted finds/treasures to set your Easter table this year?


I hope you enjoyed this post! So many of you enjoyed seeing our bunny Antoinette in my last post...I have to tell you that this past week we brought home another bunny to keep her company. He is very little and gray colored. We named him Louis. If you follow me on Instagram @larissa_jenkins you    will see lots of him in my stories. I will have to do a photo shoot of him soon for the blog...you will love him.


Thank you again for visiting!

-Larissa