
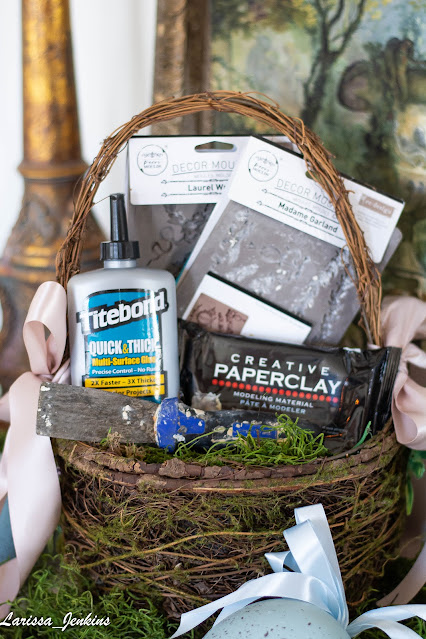
The supplies you will need are:
corn starch
paint brush
assorted acrylic/ chalk paints of your choice
large Easter egg
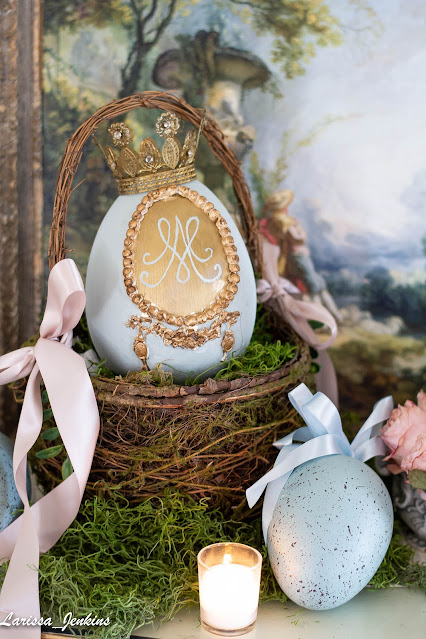
I had a few old large Easter eggs already on hand that I decided to upcycle for this project. Mine were already painted gold from a few years ago so I left them "as is" when I started working.
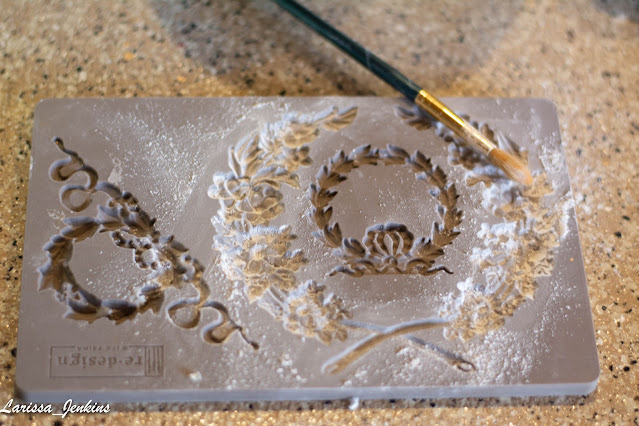
You will want to use your paint brush to dust your decor molds with corn starch, making sure you coat all of the tiny crevices.
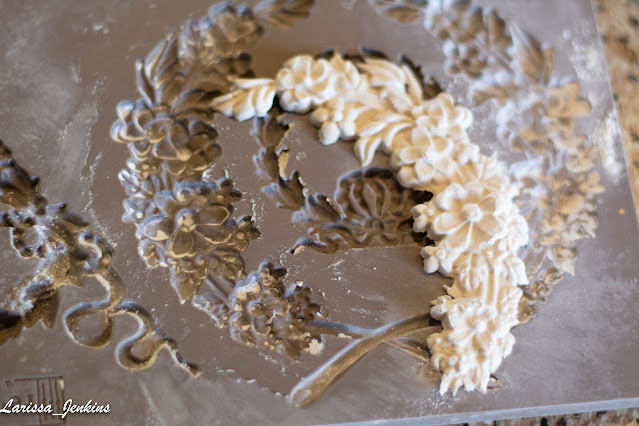
When that is finished, take your paper clay and press down firmly into the decor molds.

Take your putty knife and gently scrape away the excess paper clay until you have a smooth surface.
Gently bend the decor molds to loosen your paper clay mold so it comes out nicely.
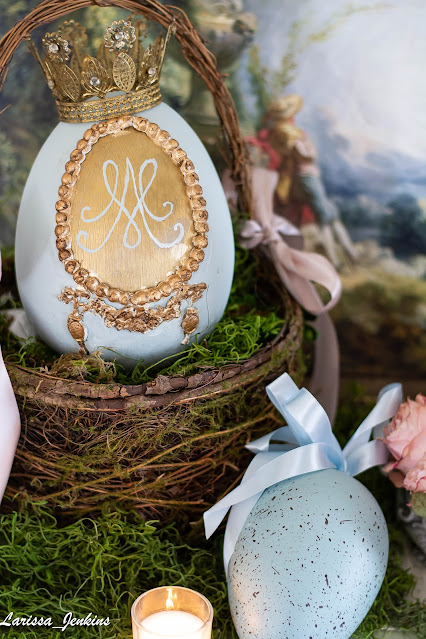
Take the paper clay mold and add the glue to the backside and begin to decorate your egg. I started with a beaded paper clay oval. Do not worry if your paper clay starts to crack, thats completely normal, it also helps to make your project look more "antique." Once that was finished, I freehanded the Monogram "M" for Marie Antoinette. Then I added a paper clay floral swag at the bottom for a pretty embellishment.

Next, I decided what type of paint I wanted to use. I had some left over latex paint in a pretty blue color and I went with that, although you can certainly use chalk paint or acrylic if you wish too! I decided to keep the center of my egg the original gold color and painted the outside blue.
I let the paper clay dry overnight and the next morning I began to paint the embellishments gold, as well as, carefully painting the monogram "M".
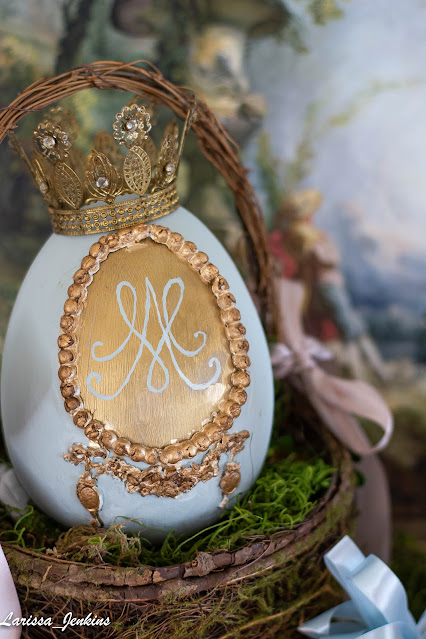
The last step was to gently use dark wax to make the gold paper clay embellishments pop! This step is not necessary. I then placed a gold crown on top for Queen Marie Antoinette!
I love creating unique holiday pieces that reflect the style of my home! Hopefully this gives you some great ideas as well! Last year I created Cinderella pumpkins in this way, and I will create some more on the blog with you this fall.
Thank you all for visiting!
-Larissa


I absolutely LOVE how this turned out, it's gorgeous!! You are so clever!! I'd love to make some in pink. ������
ReplyDeleteIt's gorgeous and so creative!
ReplyDelete